There’s something undeniably magical about a scoop of homemade ice cream-teh way it melts on your tongue, delivering waves of flavor and nostalgia with every bite. In a world buzzing with busy schedules and processed treats, crafting your own frozen masterpiece offers a refreshing pause, a chance to slow down and savor simple joys. Chill Out: The Ultimate Guide to Homemade Ice cream Bliss invites you on a delightful journey through creamy textures, luscious flavors, and the art of turning a few humble ingredients into a symphony of cold, sweet perfection. Whether you’re a curious beginner or a seasoned dessert artist, this guide will equip you with tips, tricks, and creative inspiration to transform your kitchen into an ice cream haven. Get ready to scoop, swirl, and chill your way to frozen happiness!
Chill Out: The Ultimate Guide to Homemade Ice cream bliss begins with selecting the finest ingredients that lay the foundation for irresistibly creamy and rich ice cream. Understanding the role each component plays ensures your frozen creation melts smoothly on the tongue with every luscious bite.
Prep and Cook Time
Preparation: 20 minutes | Chilling: 4 hours | Churning: 30 minutes
Yield
About 1 quart (4 servings)
Difficulty Level
Medium – perfect for adventurous home cooks eager to elevate their dessert game.
Choosing the Perfect Ingredients for Creamy Homemade Ice Cream
When crafting your ice cream base, heavy cream and whole milk are indispensable for that decadent, velvety mouthfeel.Heavy cream provides the luxurious fat content, while whole milk lends lightness and balances the richness. Fresh, high-quality ingredients are your best allies – seek out grass-fed dairy for a subtle buttery depth.
Egg yolks act as natural emulsifiers, bringing silkiness and preventing ice crystals. When using eggs, opt for free-range or organic for enhanced flavor and safety.
Pure vanilla extract or real vanilla beans elevate plain bases into fragrant symphonies of flavor. And don’t forget the sugar: fine granulated sugar dissolves smoothly, avoiding any grainy texture.
Mastering the Art of Churning for Smooth and Velvety Texture
Churning is the heartbeat of homemade ice cream bliss. It’s the mechanism that whisks air into the base, creating the coveted lightness without sacrificing creaminess.Before churning, thoroughly chill your custard base to below 40°F-this step is crucial for minimizing ice crystal formation.
Use an ice cream maker with a pre-frozen bowl or compressor; either method works wonders but requires patience to achieve the right soft serve consistency before freezing thoroughly. Stir gently and steadily-over-agitation can cause a dense, icy texture.
Innovative Flavor Combinations to Elevate Your Ice Cream Game
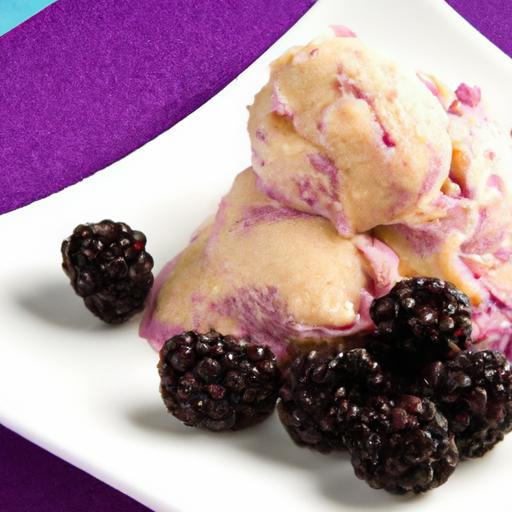
Break free from vanilla with exciting infusions that dance on the palate! Try mixing fresh herbs like basil or thyme with citrus zest for a refreshing twist. For indulgence, swirl ribbons of rich espresso caramel or crumble in bits of toasted pistachio and dark chocolate shards. Seasonal fruits also shine beautifully; simmer down a berry compote with a touch of balsamic glaze and fold gently into the churn for a flavorful surprise.
Essential Tips and Tricks for storing and Serving Your Frozen Delight
Once churned, transfer your ice cream to a shallow, airtight container. Press parchment paper on the surface before sealing to prevent ice crystals.store in the coldest part of your freezer (not the door) for the creamiest results. Before serving, let it sit at room temperature for 5 minutes to soften just enough for effortless scooping.
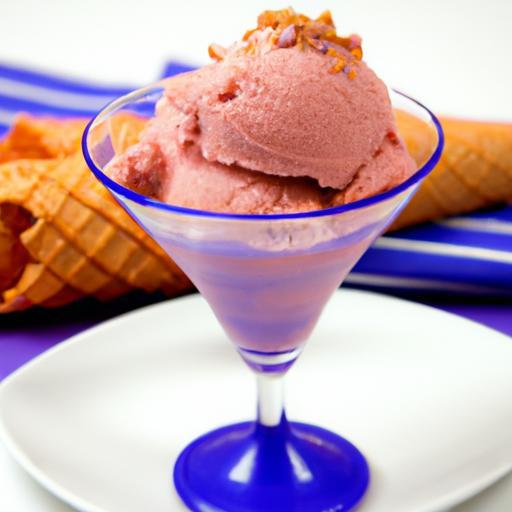
Serve your masterpiece in chilled bowls or atop crisp waffle cones. Garnish with a sprinkle of toasted nuts, fresh mint leaves, or a drizzle of homemade berry coulis for added visual and flavor appeal.
Ingredients
- 2 cups heavy cream, cold
- 1 cup whole milk, cold
- 3/4 cup granulated sugar
- 5 large egg yolks
- 1 tablespoon pure vanilla extract or 1 vanilla bean, split and scraped
- Pinch of fine sea salt
- Optional flavor add-ins: 1/2 cup chopped toasted nuts, 1/3 cup berry compote, 2 tablespoons espresso caramel sauce
Directions
- Prepare the custard base: In a medium saucepan, combine heavy cream, whole milk, half the sugar, vanilla bean seeds and pod (if using), and salt. Warm over medium heat until just steaming-do not boil.
- Whisk egg yolks and sugar: In a separate bowl, whisk the egg yolks and remaining sugar until pale and thick, about 2 minutes.
- temper the eggs: Slowly ladle about 1 cup of the warm cream mixture into the yolks while whisking vigorously. This prevents curdling.
- Cook custard: Pour the tempered egg mixture back into the saucepan and heat gently over low-medium heat, stirring constantly with a wooden spoon or spatula until the mixture coats the back of the spoon (about 170°F). Remove from heat immediately.
- Strain and chill: Strain custard through a fine mesh sieve into a clean bowl to remove curds and vanilla pod.Stir in vanilla extract (if using). Cool to room temperature, than refrigerate for at least 4 hours or overnight until fully chilled.
- Churn: Pour chilled custard into your ice cream maker and churn according to the manufacturer’s instructions, typically 20-30 minutes, until it reaches soft serve consistency.
- Add flavors: Fold in any additional mix-ins (nuts, compotes, sauces) gently with a rubber spatula during the last 5 minutes of churning or immediately after.
- Freeze: Transfer ice cream to an airtight container, press parchment paper on the surface, seal, and freeze for at least 2 hours to firm up.
Tips for Success
- Use fresh dairy and eggs for the best flavor and safety.
- Do not rush the chilling process-cold custard is critical for smoothness.
- when folding in mix-ins, gently incorporate to maintain lightness.
- If your ice cream is icy,try increasing the fat content or adding a small amount of alcohol (e.g.,1 tablespoon vodka) to inhibit crystallization.
- For an eggless version, substitute with cornstarch-thickened custard method.
Serving Suggestions
Serve scoops in chilled glass bowls or crispy waffle cones. Accent with freshly sliced berries, a sprig of mint, or a drizzle of homemade chocolate sauce. A dusting of crushed toasted nuts adds delightful crunch contrasted against the creamy texture.
Pair with a warm brownie or delicate biscotti for a luscious dessert platter that’s sure to impress.
| Nutrient | Per Serving |
|---|---|
| Calories | 320 |
| Protein | 5g |
| Carbohydrates | 28g |
| Fat | 22g |

Explore more ways to delight your taste buds and discover expert tips to advance your frozen treats. For a deep dive into dairy science, visit the International Dairy Foods Association.
Q&A
Q&A: Chill out – The Ultimate Guide to Homemade Ice Cream Bliss
Q1: Why make ice cream at home rather of buying it from the store?
A: Homemade ice cream is a canvas for creativity! You control the ingredients, flavors, and textures. Plus, there’s something incredibly satisfying about scooping out a batch you crafted with your own hands. It’s fresher, customizable, and often healthier than store-bought versions loaded with preservatives and artificial additives.
Q2: What’s the secret to making ultra-creamy homemade ice cream?
A: The magic lies in the milk fat and how you churn it. Use heavy cream or whole milk for richness, and ensure your base is well-chilled before churning. Incorporating a bit of sugar and stabilizers like egg yolks or cornstarch can improve texture, preventing icy crystals and delivering that luscious, velvety mouthfeel.
Q3: Do I need a fancy ice cream maker to make great homemade ice cream?
A: Not necessarily! While ice cream makers make the process easier and more consistent by churning continuously, you can still craft delicious ice cream with simple methods-like stirring your mixture every 30 minutes while it freezes or using a zip-top bag frozen and massaged for a quick, small-batch treat.
Q4: Can I experiment with unconventional flavors?
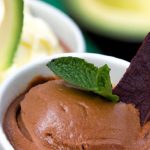
A: Absolutely – homemade ice cream is your playground. From lavender honey and chili chocolate to avocado lime and basil lemon, the flavor possibilities are endless. Try infusing herbs, spices, roasted nuts, or even a splash of your favorite spirits for a grown-up twist on bliss.
Q5: How do I store homemade ice cream without it turning rock-hard?
A: To keep your frozen treasure scoopable, store your ice cream in an airtight container and press a sheet of plastic wrap directly on the surface before sealing.Let it soften in the fridge for a few minutes before serving. Also, consuming it within a week ensures optimal taste and texture.
Q6: What’s the easiest base recipe to start with?
A: Start with the classic custard base: egg yolks, sugar, milk, and cream. It’s rich, smooth, and versatile. Once comfortable, branch out into simpler “Philadelphia-style” recipes that skip eggs, or experiment with vegan bases like coconut or almond milk.
Q7: Can kids safely get involved in making ice cream?
A: Definitely! Making ice cream is a fun and educational activity. Just skip raw eggs or use pasteurized options to avoid health risks.Kids can definitely help measure ingredients, mix flavors, and of course, enjoy the sweet payoff.
Q8: Any tips for perfect mix-ins?
A: Add mix-ins like chocolate chips, nuts, or fruit chunks during the final minutes of churning or fold them gently in after. This prevents clumping and ensures even distribution, giving every bite a delightful surprise.
Q9: How do I troubleshoot common problems like icy texture or bland flavor?
A: Icy texture frequently enough means not enough fat or improper freezing; boost cream content or churn thoroughly. For bland flavor, increase your sugar slightly or infuse your base with natural extracts. Remember,ice cream tastes best slightly sweeter than you’d expect because cold dulls taste buds.
Q10: What’s the ultimate takeaway for homemade ice cream bliss?
A: Chill out and embrace creativity! Homemade ice cream is more than a dessert – it’s an experience. From selecting your ingredients to perfecting your technique, every step is a joyful journey toward creamy, dreamy bliss that’s uniquely yours. So grab your freezer and your favorite flavors, and let the sweet adventure begin!
Key takeaways
As you embark on your homemade ice cream adventure, remember that the sweetest joys come from the blend of simple ingredients, a touch of patience, and a sprinkle of creativity. Whether you prefer classic vanilla, daring mix-ins, or dairy-free delights, your freezer holds the promise of endless flavors and chilly bliss. So scoop boldly, experiment freely, and savor every creamy bite-as when it comes to homemade ice cream, the journey is just as delightful as the destination. Here’s to turning your kitchen into a frozen treat haven, one luscious batch at a time!