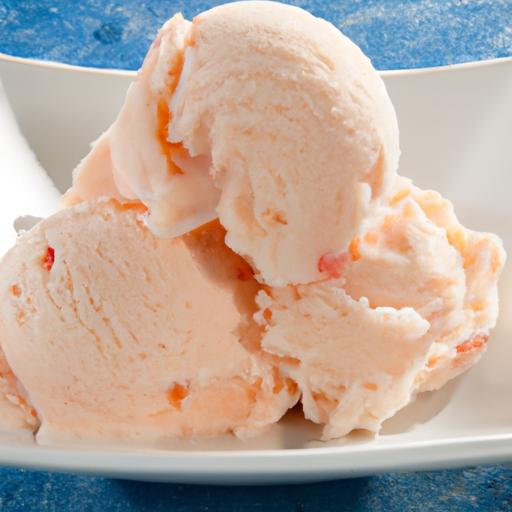
There’s something undeniably magical about a scoop of homemade ice cream-the creamy texture,the burst of fresh flavors,and the comforting feeling of crafting a sweet treat with your own two hands. As the days grow warmer and the urge to chill takes over, what better way to cool down than by creating your very own batch of tasty ice cream right at home? From classic vanilla to adventurous fruit medleys, making ice cream is both an art and a science, inviting you to blend creativity with simple ingredients. In this article, we’ll explore the joys and techniques of crafting irresistible homemade ice cream that turns any day into a delightful festivity of flavor and fun.
Choosing the Perfect Ingredients for Creamy Texture and Rich Flavor
Crafting homemade ice cream starts with selecting ingredients that guarantee both a luxuriously creamy texture and a deep,rich flavor. The foundation of any luscious scoop is high-quality dairy-opt for heavy cream with at least 36% fat and whole milk to achieve that silky mouthfeel. Freshness matters immensely here; richer dairy ensures a velvety base that doesn’t feel icy or grainy.
Sweeteners play a dual role-not only providing balance but also influencing texture. While granulated sugar is classic, experimenting with invert sugars like honey or corn syrup helps inhibit large ice crystals, enhancing smoothness. Don’t shy away from adding a pinch of salt; it amplifies the sweetness and layers of complexity.
For the ultimate indulgence, fresh egg yolks act as a natural emulsifier, promoting creaminess and preventing separation. However, for an eggless version, cornstarch can serve as a subtle thickener without compromising flavor or mouthfeel.
Mastering the Art of Mixing: Techniques for Smooth and Airy Ice Cream
Once you have your ingredients, knowing how to blend them correctly is critical for that signature homemade ice cream texture.Begin by tempering your egg yolks gently-whisking them continuously while gradually adding warmed cream-to avoid scrambling and create a silky custard. This slow integration builds a rich, cohesive base.
Chilling your custard properly before churning is a must; this stops premature freezing and helps incorporate air during the mixing process, creating more volume and an airy texture. When using an ice cream maker, keep your machine bowl frozen solid (ideally 24 hours in advance) to maintain consistent freezing temperatures.
Patience during churning is essential. Allow the machine to work for the full 25-30 minutes-rushing results in denser, icy ice cream. For extra creaminess, gently fold in mix-ins or flavor extracts at the very end rather than during the churn cycle.
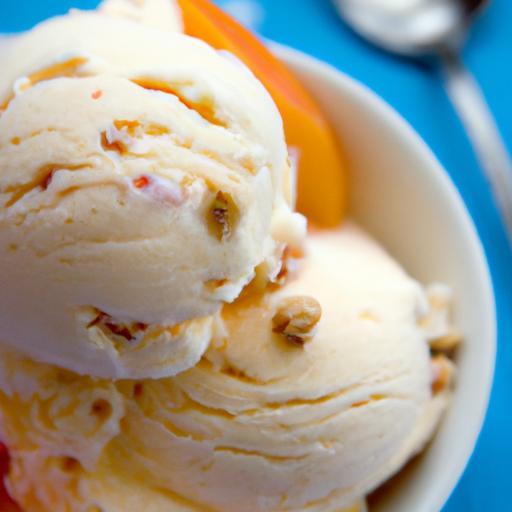
Creative Flavor Combinations to Elevate Your Homemade Treat
Elevating simple homemade ice cream into an extraordinary experience means thinking beyond vanilla. Start with classic bases like rich Bourbon vanilla or a decadent dark chocolate ganache. From there,let your imagination roam-
- Salted caramel swirls paired with toasted pecans add a sweet-salty crunch that surprises the palate.
- Fresh basil and lemon zest create a refreshing herbal brightness perfect for summer afternoons.
- Espresso shots combined with chunks of dark chocolate provide an energizing, bittersweet kick.
- Roasted stone fruits swirled through honey mascarpone offer a complex balance of floral and fruity notes.
Don’t hesitate to incorporate unique infusions like toasted coconut, cardamom, or even a splash of fine liqueur for grown-up pallet twists. Ice cream invites bold creativity-experiment, taste frequently, and trust your instincts.
Essential Tools and Tips for Effortless Ice Cream making at Home
having the right tools transforms making homemade ice cream from a chore into an enjoyable ritual. An ice cream maker with a well-frozen bowl is your best ally,but for small batches,don’t overlook high-power blenders or no-churn methods that simplify the process.
A reliable digital thermometer is invaluable for achieving perfect custard temperatures between 170-175°F-low enough to thicken without curdling. opt for silicone spatulas to gently fold in ingredients without deflating your airy base.
For cleanup and storage, keep airtight, freezer-safe containers on hand to preserve freshness and texture. Cover ice cream surfaces with plastic wrap before sealing to avoid ice crystal formation. Lastly, allow your frozen creation to sit at room temperature for 5 minutes before scooping; this softens it just enough for serving without melting.
Prep and Cook Time
- Prep: 20 minutes
- Cook: 15 minutes
- Chill: 4 hours (minimum)
- Churn: 25-30 minutes
Yield
Approximately 1 quart (4 generous servings)
Difficulty Level
Medium – requires careful custard preparation and patience during chilling and churning
Ingredients
- 2 cups heavy cream (36% fat or higher)
- 1 cup whole milk
- 3/4 cup granulated sugar
- 5 large egg yolks
- 1 tablespoon pure vanilla extract
- Pinch of fine sea salt
- Optional mix-ins: 1/2 cup chopped toasted nuts, 1/3 cup caramel sauce, or 2 tablespoons espresso
Instructions
- Warm the dairy: In a medium saucepan, combine heavy cream, whole milk, and half the sugar. Heat over medium, stirring occasionally, until the mixture is hot but not boiling (about 170°F).
- Whisk egg yolks: In a separate bowl, vigorously whisk the egg yolks with the remaining sugar until pale and slightly thickened.
- Temper the yolks: Slowly pour about 1/3 of the hot dairy mixture into the yolks, whisking constantly.Then, gradually whisk this back into the saucepan with the remaining dairy.
- Cook custard: Over low heat, cook the mixture, stirring constantly with a wooden spoon or silicone spatula, until it thickens and coats the back of the spoon (~175°F). do not let it boil.
- Strain and chill: Pour the custard through a fine mesh sieve into a clean bowl to remove any cooked bits. Stir in the vanilla extract and sea salt. Cover with plastic wrap, pressing it directly onto the surface to prevent skin. Chill for at least 4 hours or overnight.
- Churn: Pour chilled custard into your frozen ice cream maker bowl. churn according to manufacturer’s instructions (25-30 minutes) until thick and creamy.
- Add mix-ins: Gently fold in any desired additions in the last 5 minutes of churning or promptly after.
- Freeze and serve: Transfer ice cream to an airtight container and freeze for at least 2 hours for firmer texture. Remove from freezer 5 minutes before serving.
Chef’s Notes
- egg-free option: Substitute yolks with 2 tablespoons cornstarch mixed with 1/4 cup milk; heat until thickened.
- Sweetener swaps: Honey or maple syrup add complexity but reduce sugar slightly as they’re sweeter.
- no churn hack: Beat 2 cups heavy cream to stiff peaks, then fold in sweetened condensed milk and flavorings before freezing.
- Storage tip: Use parchment paper between layers in your container to avoid freezer burn and maintain texture.
- Troubleshooting: If ice cream freezes too hard, mix in a teaspoon of vodka or other alcohol to soften.
Serving Suggestions
Serve scoops in chilled bowls or waffle cones for a classic presentation. Elevate with toppings like fresh berries, a drizzle of rich chocolate ganache, or a sprinkle of flaky sea salt to heighten flavors. For a seasonal touch, pair your creation with warm fruit compotes or delicate herbal syrups. Garnish with edible flowers or finely chopped toasted nuts to delight both the eye and palate.
| Nutrient | Per serving (1/4 quart) |
|---|---|
| Calories | 320 kcal |
| protein | 5 g |
| Carbohydrates | 28 g |
| Fat | 20 g |

Explore more creative recipes and tips on homemade frozen desserts in our Frozen Dessert Ideas Collection.For science behind emulsifiers in ice cream, visit Serious Eats’ clarification of ice cream chemistry.
Q&A
Q&A: Chill at Home – Crafting Delicious Homemade Ice Cream
Q1: Why make ice cream at home when there are so many great options at the store?
A: Making ice cream at home is a delicious adventure that lets you customize flavors,control ingredients,and enjoy the freshest treat possible. Plus, it’s a fun, hands-on experience that turns your kitchen into a mini creamery. No preservatives, no limits-just pure, creamy bliss tailored to your taste buds.
Q2: What basic ingredients do I need to create classic homemade ice cream?
A: At its core, ice cream is about a few simple players: heavy cream, whole milk, sugar, and egg yolks (for custard-style). These ingredients harmonize to create that smooth, creamy texture and rich flavor. From there, the sky’s the limit-vanilla beans, cocoa, fresh fruit, nuts, or even a splash of espresso.
Q3: How important is an ice cream maker for homemade ice cream?
A: An ice cream maker is like the wizard’s wand in your dessert arsenal-it churns and aerates the mixture, preventing ice crystals and creating that luscious texture. While you can make simpler no-churn versions, a machine takes your creation from tasty to tantalizing by achieving that classic creamy consistency.
Q4: Can I experiment with flavors beyond vanilla and chocolate?
A: Absolutely! Homemade ice cream is your playground. From lavender-honey to spicy chai, or mango-tarragon to salted caramel with crunchy pretzel bits-the possibilities are endless. Using fresh herbs, spices, and seasonal fruits can elevate your scoop to gourmet heights.
Q5: What tips ensure my ice cream isn’t icy or grainy?
A: The secret lies in balancing fat, sugar, and air. Use enough fat (cream and milk) for creaminess, sugar not only for sweetness but to lower freezing point, and churn properly to introduce air.Also, chilling your base thoroughly before churning and storing your ice cream at the right temperature helps keep that silky texture intact.Q6: How long does homemade ice cream last in the freezer?
A: For the best taste and texture, enjoy your homemade batch within 1-2 weeks. Beyond that, ice crystals might form, subtly altering the creaminess you worked so hard to achieve.Proper storage in airtight containers minimizes freezer burn and keeps flavors fresh.
Q7: Can I make dairy-free homemade ice cream?
A: Yes! Substitute heavy cream and milk with coconut milk, almond milk, or cashew cream to create dreamy dairy-free versions. These bases require different techniques and sometimes stabilizers, but the result is just as indulgent-perfect for vegan or lactose-intolerant ice cream lovers.
Q8: What’s the best way to serve homemade ice cream?
A: Serve it straight from the freezer with fun toppings like fresh berries, toasted nuts, or a drizzle of homemade fudge. Or, get creative-sandwich scoops between cookies, float them atop hot espresso, or fold them into milkshakes. The charm of homemade ice cream is that it’s as versatile as your cravings.
Ready to churn, scoop, and savor? Making ice cream at home turns chilling into an art form-delicious, customizable, and endlessly rewarding.So grab your spoons and get ready to chill like never before!
Closing Remarks
As the summer sun gently warms your windowsill, there’s nothing quite like the satisfaction of savoring a scoop of ice cream crafted with your own hands. Homemade ice cream doesn’t just cool you down-it connects you to a world of creativity, flavor, and simple joys right from the comfort of your kitchen. So next time the craving strikes, remember: with just a few ingredients and a little imagination, you can freeze your favorite memories and mix your sweetest dreams into every bite. Chill at home, indulge freely, and let each spoonful remind you that the best treats are the ones you make yourself.