In the vibrant tapestry of Latin american cuisine, few dishes evoke the warmth of home and tradition quite like the humble arepa. This golden, crispy staple, with its soft, doughy heart, is more than just food-it’s a cultural icon, a canvas for countless flavors, and a comfort that transcends borders. Whether you’re a seasoned cook or a curious newcomer, mastering the art of the arepa opens the door to authentic tastes and timeless techniques. In this article, we’ll guide you step-by-step through the process of crafting perfect arepas, unlocking the secrets that transform simple ingredients into a mouthwatering experience worthy of any kitchen table. Get ready to savor the true essence of tradition,one bite at a time.
mastering arepas begins with understanding the essential components that give them their beloved traditional flavor and texture. This Venezuelan and Colombian staple,a cornmeal-based delight,balances simplicity and craft,resulting in a flourish of crispy crust and fluffy interior. With the right cornmeal, a perfectly hydrated dough, and expert cooking techniques, you can transform humble ingredients into an irresistible canvas for endless savory or sweet fillings.
Prep and Cook Time
- Preparation: 15 minutes
- Resting Dough: 10 minutes
- Cooking: 20 minutes
- Total Time: 45 minutes
Yield
Makes 6 medium-sized arepas (about 4 inches in diameter)
Difficulty Level
Medium – perfect for cooks eager to refine their dough crafting and pan-frying skills
Ingredients
- 2 cups pre-cooked white cornmeal (such as harina P.A.N.)
- 2 1/2 cups warm water
- 1 tsp fine sea salt
- 2 tbsp vegetable oil (plus additional for frying)
- Optional: 1 cup shredded mozzarella or queso fresco for cheesy arepas
Instructions
- combine the cornmeal and salt in a large bowl, stirring to evenly distribute the salt and break up any lumps in the dry cornmeal.
- Gradually add the warm water, stirring with your hand or a wooden spoon until the mixture forms a soft, pliable dough that’s neither sticky nor dry. Let it rest for 10 minutes, allowing the cornmeal to fully hydrate. This step is critical for achieving a tender interior.
- Knead the dough gently for about 2 minutes, incorporating the oil as you go. The dough should feel smooth and resilient but not crumbly. If too dry, add water teaspoon by teaspoon; if too wet, add a bit more cornmeal.
- Divide the dough into 6 equal portions.Roll each into a ball and then flatten each gently to form discs about ¾ inch thick and 4 inches in diameter. If using cheese, press a small handful into the center and seal well.
- Preheat a non-stick skillet or cast-iron pan over medium heat. Add a small amount of oil to coat the surface.
- Cook the arepas for 4-5 minutes on each side or until a golden crust forms. Flip carefully to prevent cracking. The crust should be deeply golden and crisp while the interior remains soft and fluffy.
- Transfer arepas to a baking sheet and finish baking in a preheated 350°F oven for 10 minutes to ensure thorough cooking and a perfect fluffy texture inside.
Tips for Success
- Choosing Cornmeal: Always use pre-cooked cornmeal (masarepa). It’s specially treated to produce that perfect, traditional texture. Avoid regular cornmeal or polenta,which can yield coarse or gritty results.
- Hydration Balance: The dough shouldn’t stick excessively to your hands but must feel moist. Adjust water and cornmeal carefully to avoid dry,crumbly dough or overly wet dough that won’t hold shape.
- Resting is Essential: Allowing the dough to rest facilitates uniform moisture absorption, which translates into perfect fluffiness inside.
- Cook Low & Slow: Maintain a medium to medium-low heat to develop the crust without burning the arepas’ exterior.
- Make-Ahead Option: you can prepare the dough and shape arepas a few hours ahead. Store covered in the fridge and cook just before serving.
Serving Suggestions
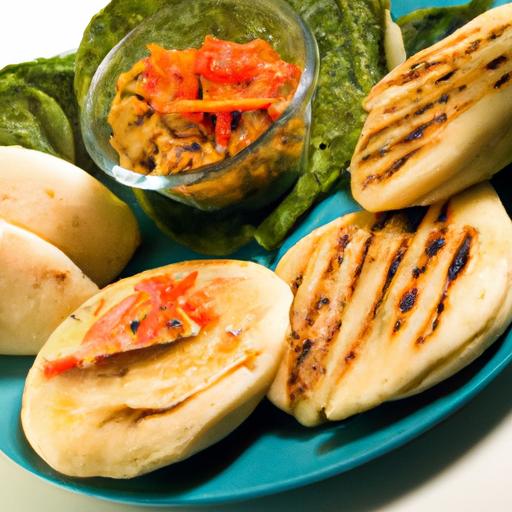
Serve arepas warm, split open, and filled with your choice of indulgences. Popular fillings include slow-cooked shredded beef (carne mechada), black beans and avocado, grilled chicken with garlic sauce, or simple melted butter and cheese. For breakfast, try scrambled eggs and fresh tomatoes. Garnish with fresh cilantro, a sprinkle of cotija cheese, or a drizzle of tangy ají picante.
To elevate the presentation, stack arepas on a rustic wooden board with colorful bowls of fillings and sauces. Their golden crusts paired with vibrant fillings make an inviting sight and an even greater pleasure to eat.

| Nutrient | Per Arepa (approx.) |
|---|---|
| Calories | 180 |
| Protein | 4g |
| Carbohydrates | 36g |
| Fat | 3g |
For more inspiration on Latin American breads and cornmeal dishes, check out our Perfect Cornbread Recipe. Also, deepen your understanding of cornmeal varieties via the authoritative US department of Agriculture’s corn products guide.
Q&A
Q&A: Mastering Arepas – A step-by-Step Recipe for Authentic Flavor
Q1: what exactly are arepas, and why are they so beloved?
A1: Arepas are a traditional staple from Venezuela and Colombia, made from simple cornmeal dough that’s crispy on the outside yet tender and fluffy inside. They’re beloved because they serve as a versatile canvas for countless fillings and toppings, delivering a comforting taste that feels like a warm hug from Latin America.
Q2: What type of cornmeal should I use to achieve authentic arepas?
A2: The secret behind authentic arepas lies in pre-cooked cornmeal, often labeled as “masa precocida.” Brands like P.A.N. or Harina Juana are popular choices. This specially treated cornmeal hydrates evenly and forms the perfect dough-nothing too gritty or crumbly.
Q3: How do I know when the dough is ready?
A3: your arepa dough should be soft, pliable, and just moist enough to hold its shape without cracking. When you squeeze a small ball, it shouldn’t crumble or stick excessively to your fingers. Think of it as the Goldilocks zone of dough-just right for molding.
Q4: Can I make arepas gluten-free?
A4: Absolutely! Since arepas are naturally made with cornmeal, they are inherently gluten-free. Just double-check that your cornmeal isn’t processed in a facility with gluten-containing grains if you have sensitivities.
Q5: What’s the best way to cook an arepa for that perfect texture?
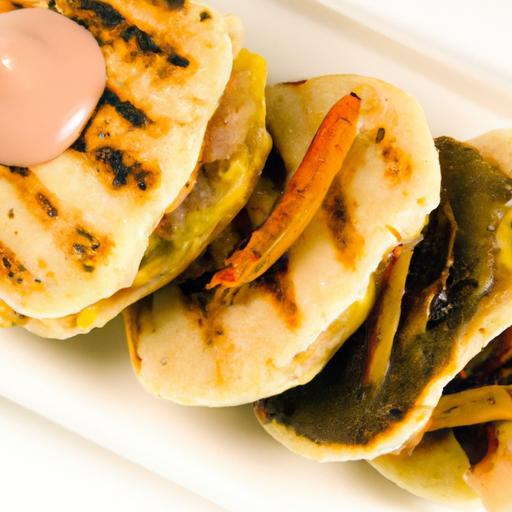
A5: Traditionalists swear by a two-step cooking method: first, lightly frying the arepas in a skillet to form a golden crust, then finishing them in the oven or on a covered pan to cook through evenly. This method yields a crunchy exterior with a soft, warm center-irresistible!
Q6: How do I avoid arepas cracking or drying out during cooking?
A6: Keep your dough properly hydrated and don’t overcook them. Also, cooking on medium heat allows the arepas to develop a crust without burning while ensuring the inside steams just enough to stay moist.Covering the pan during the finishing stage helps trap steam for tenderness.
Q7: What are some classic fillings or toppings to try?
A7: Think beyond the basic. Traditional options include shredded beef (carne mechada), black beans and cheese, avocado slices, or creamy chicken salad. For a sweet twist, try arepas with butter and honey or ripe plantains with cheese.
Q8: Can I prepare arepas in advance?
A8: Yes! You can shape the dough into discs and refrigerate or freeze them raw. When ready to cook, simply thaw if frozen and proceed with frying and baking. Freshly cooked arepas always taste best, but this prep hack saves time on busy days.
Q9: What’s the cultural significance of arepas in Venezuela and Colombia?
A9: Arepas are more than just food-they’re a symbol of comfort, community, and heritage. Served at breakfast tables, street corners, and family feasts, they connect generations and tell stories of tradition, creativity, and the vibrant soul of Latin america.
Q10: Any expert tips for first-time arepa makers?
A10: Don’t rush the process-treat the dough with care, water the skillet if needed to prevent sticking, and experiment with fillings to find your personal favorite. Remember, mastering arepas is as much about the journey as the flavorful destination!
in summary
Mastering the art of the arepa is more than just following a recipe-it’s an invitation to connect with a rich cultural tradition that has stood the test of time.With each step, from mixing the dough to achieving that perfect golden crust, you’re not only crafting a delicious meal but also honoring generations of flavor and craftsmanship.Whether you prefer them stuffed, topped, or enjoyed plain, these versatile pockets of goodness promise a satisfying taste of authenticity in every bite. So roll up your sleeves, embrace the process, and let your kitchen become a gateway to the vibrant world of arepas-where simplicity meets soul in the most delicious way.