There’s something undeniably delightful about chicken piccata-the bright, zesty tang of lemon mingling with the silky richness of butter and the subtle punch of capers, all wrapped around tender, golden-browned chicken. Yet, achieving that perfect balance of tangy vibrance and melt-in-your-mouth tenderness can seem intimidating for home cooks. Fear not! In this article, we’ll unravel simple, foolproof steps to help you master chicken piccata with ease. Whether you’re a novice in the kitchen or looking to refine your technique, get ready to elevate this classic Italian-American favorite into a vibrant, crowd-pleasing masterpiece every time.
Choosing the right cut for juicy and tender results is the cornerstone of making an unforgettable chicken piccata. For this dish, thinly sliced chicken breasts or chicken cutlets work perfectly, as their even thickness ensures swift, uniform cooking while locking in moisture. Avoid thicker cuts which can dry out or cook unevenly. If you prefer,gently pounding your chicken breasts to about 1/4-inch thickness is an excellent way to achieve that delicate tenderness while still maintaining the juicy texture that defines this classic Italian-American favorite.
Mastering the Art of properly Dredging and Searing
To capture that golden crust essential to chicken piccata’s appeal, begin by seasoning each piece generously with salt and pepper. Then,dredge the chicken lightly in all-purpose flour - the coating should be just enough to form a thin,even layer. the secret to achieving a beautifully crisp exterior lies in the oil temperature: heat a combination of olive oil and butter over medium-high heat until shimmering but not smoking. Place the chicken cutlets gently into the pan and allow them to sear without moving for 3-4 minutes per side. This patient technique prevents tearing and yields an indulgently caramelized crust that locks in succulent juices.
Crafting the Classic Lemon Caper Sauce with a Tangy Twist
The sauce is where the magic truly happens – bright,zesty,and bursting with flavor. After removing the chicken to rest, use the pan drippings to build a luscious sauce. Start by deglazing with a splash of dry white wine or chicken broth, scraping up those deeply browned bits for an umami boost. Next, add freshly squeezed lemon juice and a generous spoonful of capers, simmering gently to marry the tartness with subtle briny notes. For a tangy twist that elevates the flavor, stir in a touch of lemon zest and finish with a knob of butter to achieve a silky, glossy finish. this harmony of bright and rich creates a sauce that feels both refreshing and indulgent.
Finishing Touches for a Balanced and Beautiful Presentation
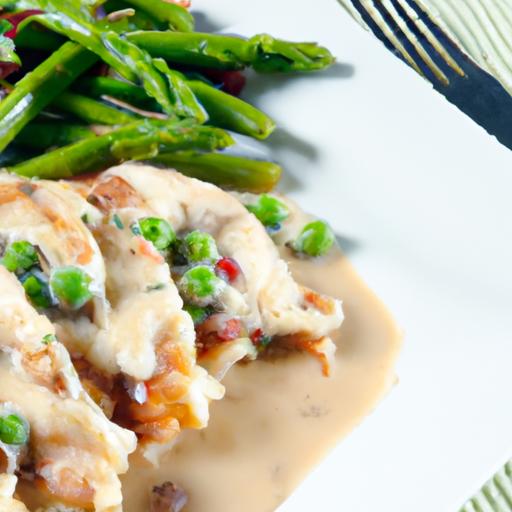
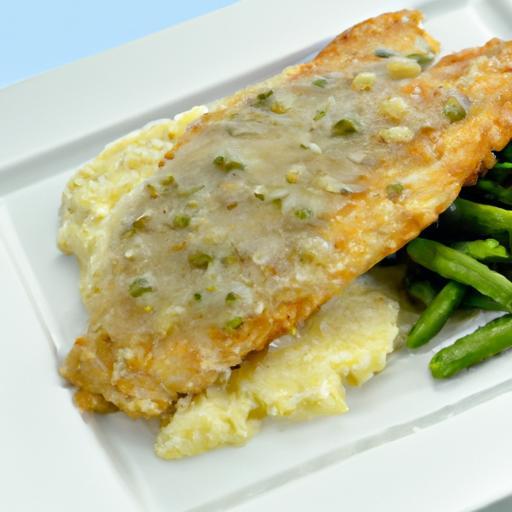
Presentation transforms simple ingredients into a feast for the eyes. Rest your chicken briefly to let the juices settle, then plate each cutlet with a generous drizzle of your lemon caper sauce. Garnish thoughtfully with a scattering of fresh chopped parsley and thin lemon slices, adding vibrant color and a hint of freshness.Pairing this dish with lightly sautéed green beans or a delicate herb-infused risotto will round out the meal beautifully. Don’t forget, the right plating-clean edges, thoughtful garnishes, and a splash of sauce-turns every serving into an inviting masterpiece.
Prep and Cook Time
- Preparation: 15 minutes
- Cooking: 15 minutes
- Total: 30 minutes
Yield
- Serves 4
Difficulty Level
- Easy
Ingredients
- 4 boneless, skinless chicken breasts (pounded to 1/4 inch thickness)
- 1 cup all-purpose flour, sifted
- Salt and freshly ground black pepper, to taste
- 3 tbsp olive oil
- 2 tbsp unsalted butter
- 1/2 cup dry white wine or low-sodium chicken broth
- 1/4 cup fresh lemon juice (about 2 lemons)
- 1 tbsp lemon zest
- 3 tbsp capers, drained
- 2 tbsp fresh parsley, finely chopped
Instructions
- Pat the chicken breasts dry and season both sides liberally with salt and pepper.
- Place the flour on a shallow plate. Dredge each chicken breast in flour, shaking off any excess to ensure a thin, even coating.
- Heat olive oil and butter together in a large skillet over medium-high heat until hot and shimmering.
- Carefully add the chicken breasts, cooking undisturbed for about 4 minutes until the undersides are golden brown and crisp.
- Flip the chicken and cook for another 3-4 minutes until cooked through.Transfer to a warm plate and tent loosely with foil.
- Deglaze the skillet with white wine or chicken broth, scraping up all browned bits with a wooden spoon.
- Add the lemon juice, lemon zest, and capers.Bring the sauce to a gentle simmer and cook for 2-3 minutes, letting the flavors meld.
- Whisk in the butter to finish the sauce with a glossy sheen.Taste and adjust seasoning if necessary.
- Return the chicken to the skillet briefly,spooning the sauce over each piece to coat and warm through.
- Serve promptly, garnished with fresh parsley and additional lemon slices if desired.
tips for Success
- Use room temperature chicken to ensure even cooking and prevent toughness.
- Don’t overcrowd the pan; sear the chicken in batches if needed to maintain the perfect golden crust.
- for an extra layer of flavor, marinate chicken briefly in lemon juice and garlic before dredging.
- if you prefer thick-cut chicken breasts, slice them horizontally into cutlets or pound to a uniform thinness.
- Leftovers keep well and taste fantastic reheated gently with a splash of chicken broth to moisten.
Serving Suggestions
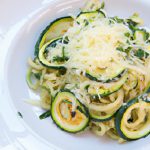
Pair this tangy and tender dish with a light side of garlic roasted asparagus, a fluffy lemon-parmesan risotto, or even simple buttered angel hair pasta tossed with parsley. A crisp white wine like Pinot Grigio or Sauvignon Blanc complements the citrusy sauce perfectly.garnish plates with fresh parsley and a thin lemon wheel for an inviting pop of color that beckons one to dive right in.
| Nutrient | Per Serving |
|---|---|
| Calories | 320 kcal |
| Protein | 38 g |
| Carbohydrates | 10 g |
| Fat | 12 g |

For more delicious Italian classics, explore our Authentic Chicken Marsala recipe. To understand the benefits of cooking with capers and citrus, visit Healthline’s guide on capers and lemon.
Q&A
Q&A: Simple Steps to Perfectly Tangy & Tender Chicken Piccata
Q1: What exactly is Chicken Piccata?
A1: Chicken Piccata is a classic Italian-American dish featuring tender chicken breasts sautéed to golden perfection, then bathed in a bright, tangy sauce crafted from lemon juice, capers, and a touch of butter. It’s a harmonious blend of zesty and savory flavors that make every bite irresistibly fresh and delicious.
Q2: How can I ensure my chicken turns out tender, not rubbery?
A2: The secret to tender chicken piccata lies in pounding the chicken breasts evenly to about ½ inch thickness. This ensures quick,even cooking and prevents dryness. Additionally,avoid overcooking – sauté each side just until golden and the internal temperature reaches 165°F (74°C). Resting the chicken briefly after cooking helps retain juiciness.
Q3: Why is the tangy lemon flavor so crucial?
A3: The lemon juice is the superhero that wakes up the entire dish. Its sharp acidity cuts through the richness of butter and chicken, providing a refreshing brightness that balances the flavors perfectly. Freshly squeezed lemon is key-not bottled juice-to achieve that crisp, vibrant tang.
Q4: Is it necessary to dredge the chicken in flour?
A4: Absolutely! A light dredge in flour creates a delicate crust that adds texture and helps thicken the luscious sauce as it cooks. It also gives the sauce something to cling to, enhancing each bite with that perfect blend of crispy and saucy.
Q5: What role do capers play in Chicken Piccata?
A5: Capers are the little bursts of salty, briny magic that elevate the dish from simple to stunning. They add complexity and a punch of savory piquancy that complements the lemon’s brightness and the richness of the butter, creating a well-rounded flavor profile.Q6: Can I make Chicken Piccata ahead of time?
A6: While it’s best enjoyed fresh to savor that crisp chicken and lively sauce, you can prepare the components ahead-like pressing and dredging the chicken or making the sauce. Just reheat gently on the stovetop, adding a splash of broth or lemon juice to revive the sauce’s fresh zing before serving.
Q7: what sides pair beautifully with Chicken Piccata?
A7: Think simple yet elegant-steamed asparagus, garlic mashed potatoes, or a light arugula salad all complement the tangy, buttery chicken without overwhelming it. A side of crusty bread is perfect for soaking up every last drop of that heavenly sauce.
Q8: Any tips for making the sauce silky and smooth?
A8: to achieve a glossy, smooth sauce, finish it off by whisking in cold butter off the heat.This technique, called “mounting” the sauce with butter, adds richness and sheen without breaking the sauce, giving it that restaurant-quality polish.
Q9: How can I tweak the recipe for dietary preferences?
A9: For a gluten-free version, substitute flour with cornstarch or almond flour for dredging. to lighten the dish, swap butter for olive oil, though you might lose some of the silky richness. You can also experiment with chicken thighs for a juicier, more forgiving cut.
Q10: What’s the best way to present Chicken Piccata for guests?
A10: Serve the chicken arranged neatly over a bed of pasta or creamy polenta, spoon the luscious sauce generously over the top, and garnish with fresh parsley and extra lemon wedges. The vibrant colors and enticing aroma will make your guests eager to dig in!
Key Takeaways
Bringing together the bright zing of lemon, the mellow pop of capers, and the delicate tenderness of perfectly cooked chicken, mastering Chicken Piccata need not be a culinary mystery. With these simple steps, you can confidently create a dish that dances on your taste buds and delights guests with every bite.So next time you crave a meal that’s both tangy and tender, remember: the art of Chicken Piccata is just a few easy moves away, ready to transform your dinner table into an Italian trattoria of flavor and finesse. Buon appetito!